
Tenant Billing
A merchant manages their own subscription from the Billing menu in their admin panel — reviewing their plan and usage, comparing plans, subscribing, and viewing invoices.
What you'll learn
- How a tenant reads their plan overview and usage
- How a tenant chooses and pays for a plan
- Where a tenant finds invoices and plan history
Plan Overview
Go to Billing → Overview for a snapshot of the current plan: its name and price, next billing date, payment status, and payment method.
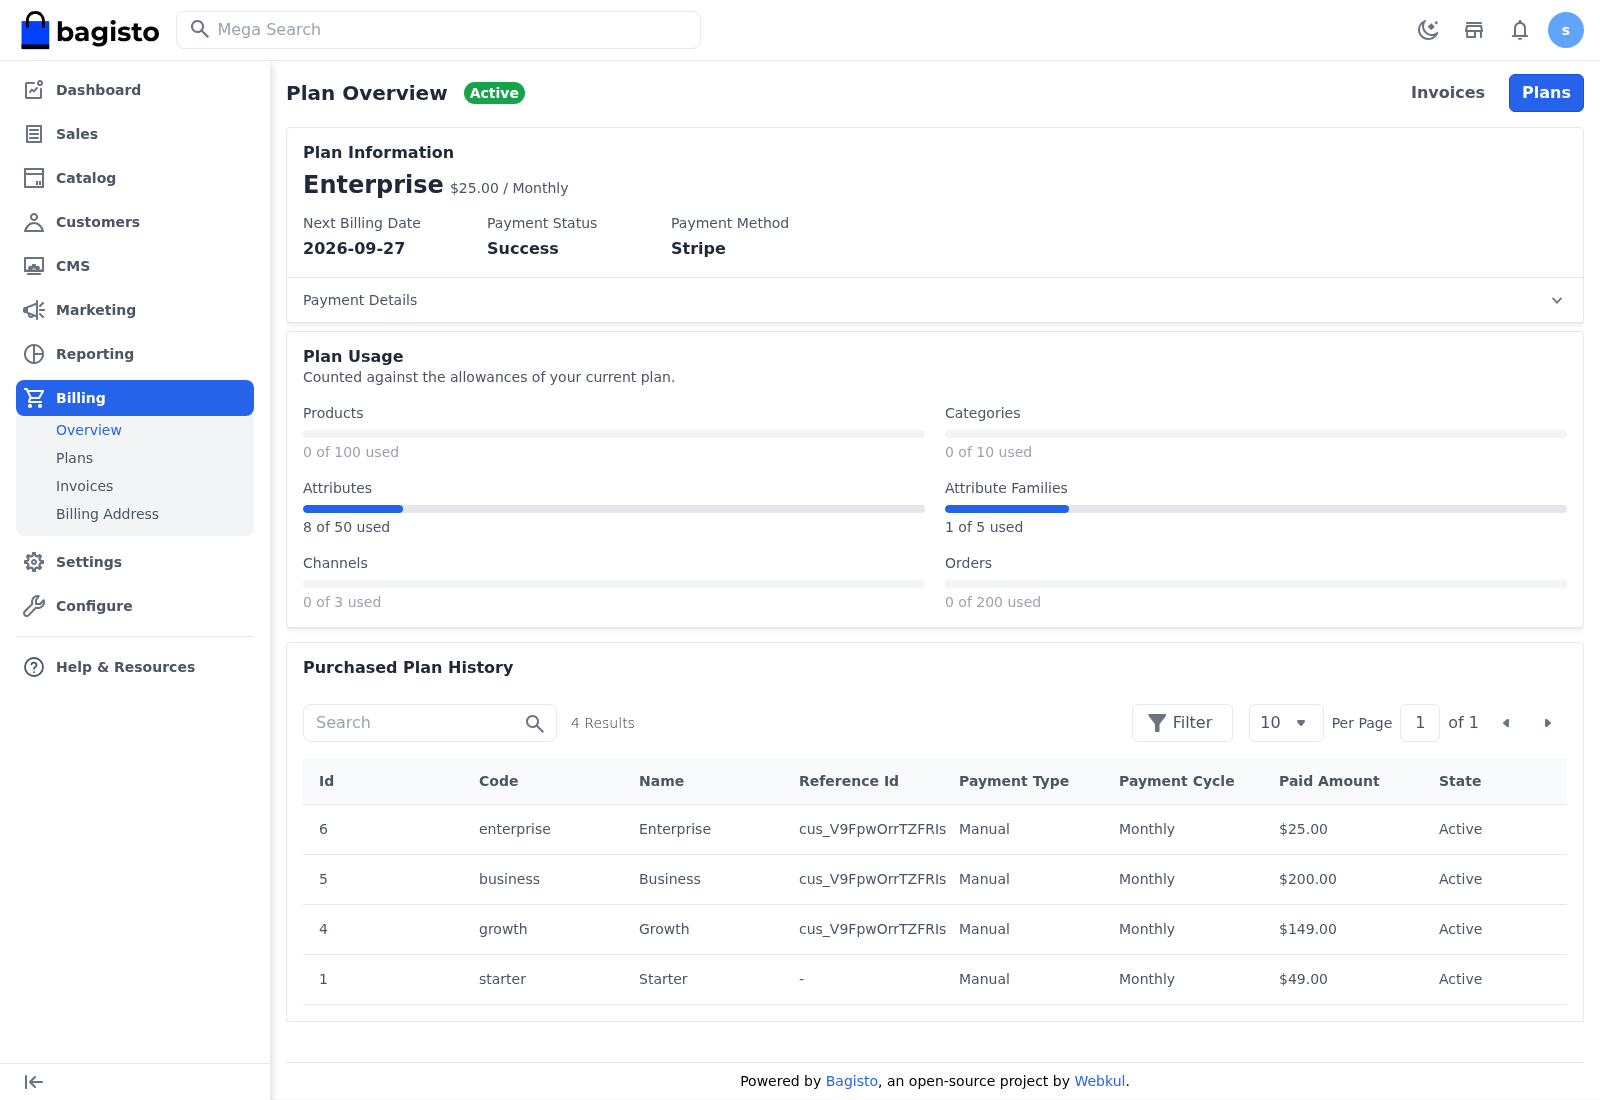
Plan Usage shows how much of each allowance is used — products, categories, attributes, attribute families, channels, and orders — as a bar against the plan's limit. Purchased Plan History below lists every plan the store has been on.
WARNING
When a store gets close to a plan allowance, the usage bar warns the merchant. To keep adding once a limit is reached, the tenant must upgrade to a plan with a higher allowance.
Choosing a plan
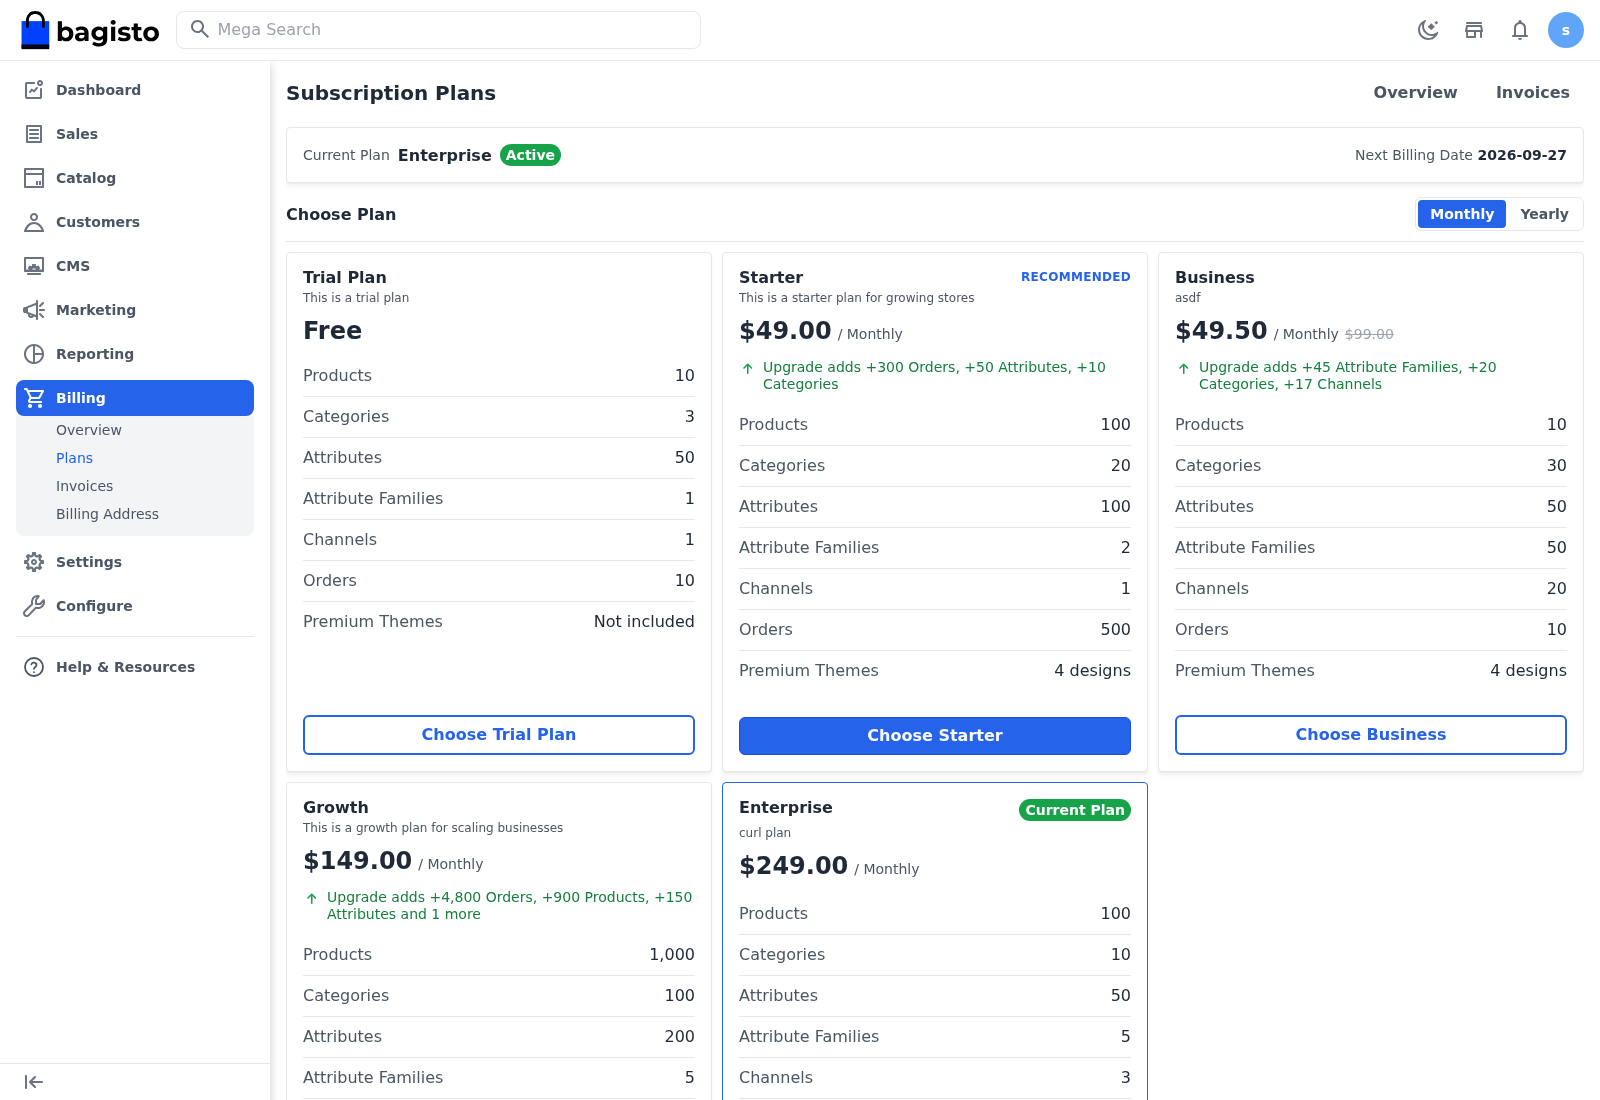
Go to Billing → Plans to compare every available plan side by side, each with its price and feature list. Toggle between Monthly and Yearly pricing; the current plan is marked. Select Choose on a plan to start subscribing.
At checkout the merchant enters their billing details, picks a payment method — Stripe, PayPal, or Manual — and confirms. With Stripe or PayPal they are redirected to pay securely; with Manual, an invoice is generated instead.
Invoices
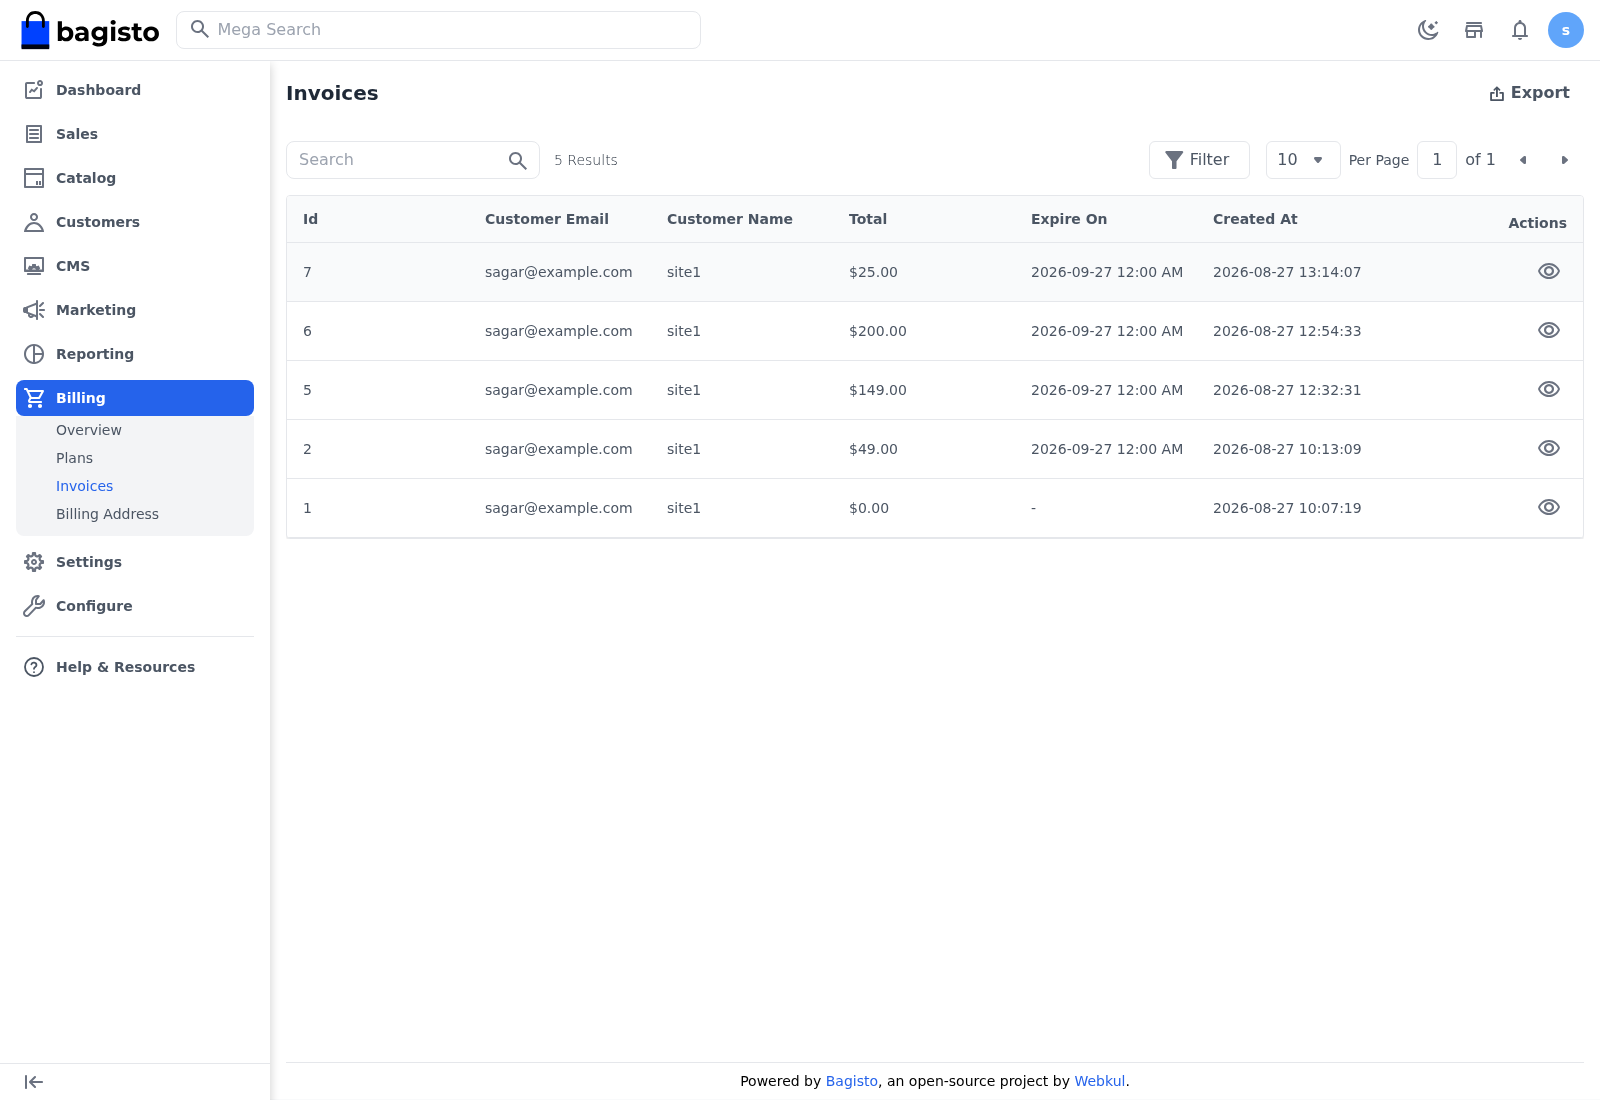
Go to Billing → Invoices for the store's own subscription invoices. Click the View icon to open one.
Purchased Plan History
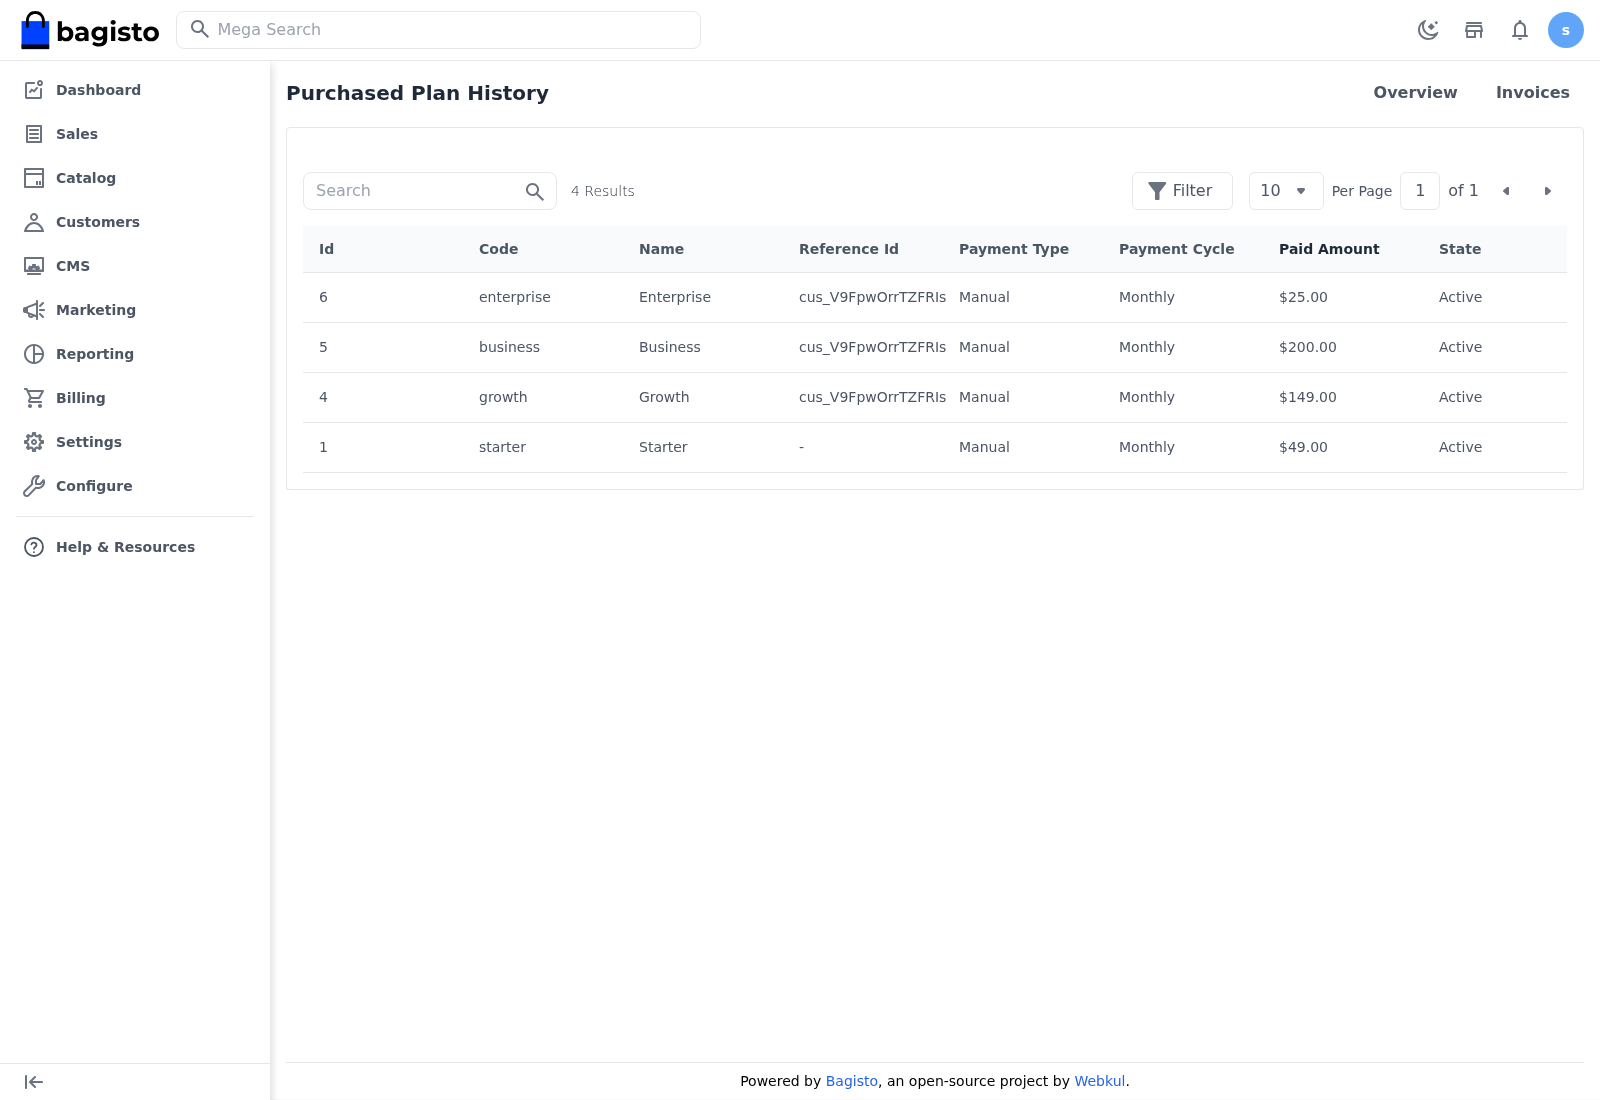
The overview and plans screens show the store's Purchased Plan History — every plan it has subscribed to, with the paid amount, payment cycle, and state.
TIP
The plan a tenant is on also decides which storefront themes they can use — upgrading to a plan with premium themes unlocks the premium designs.